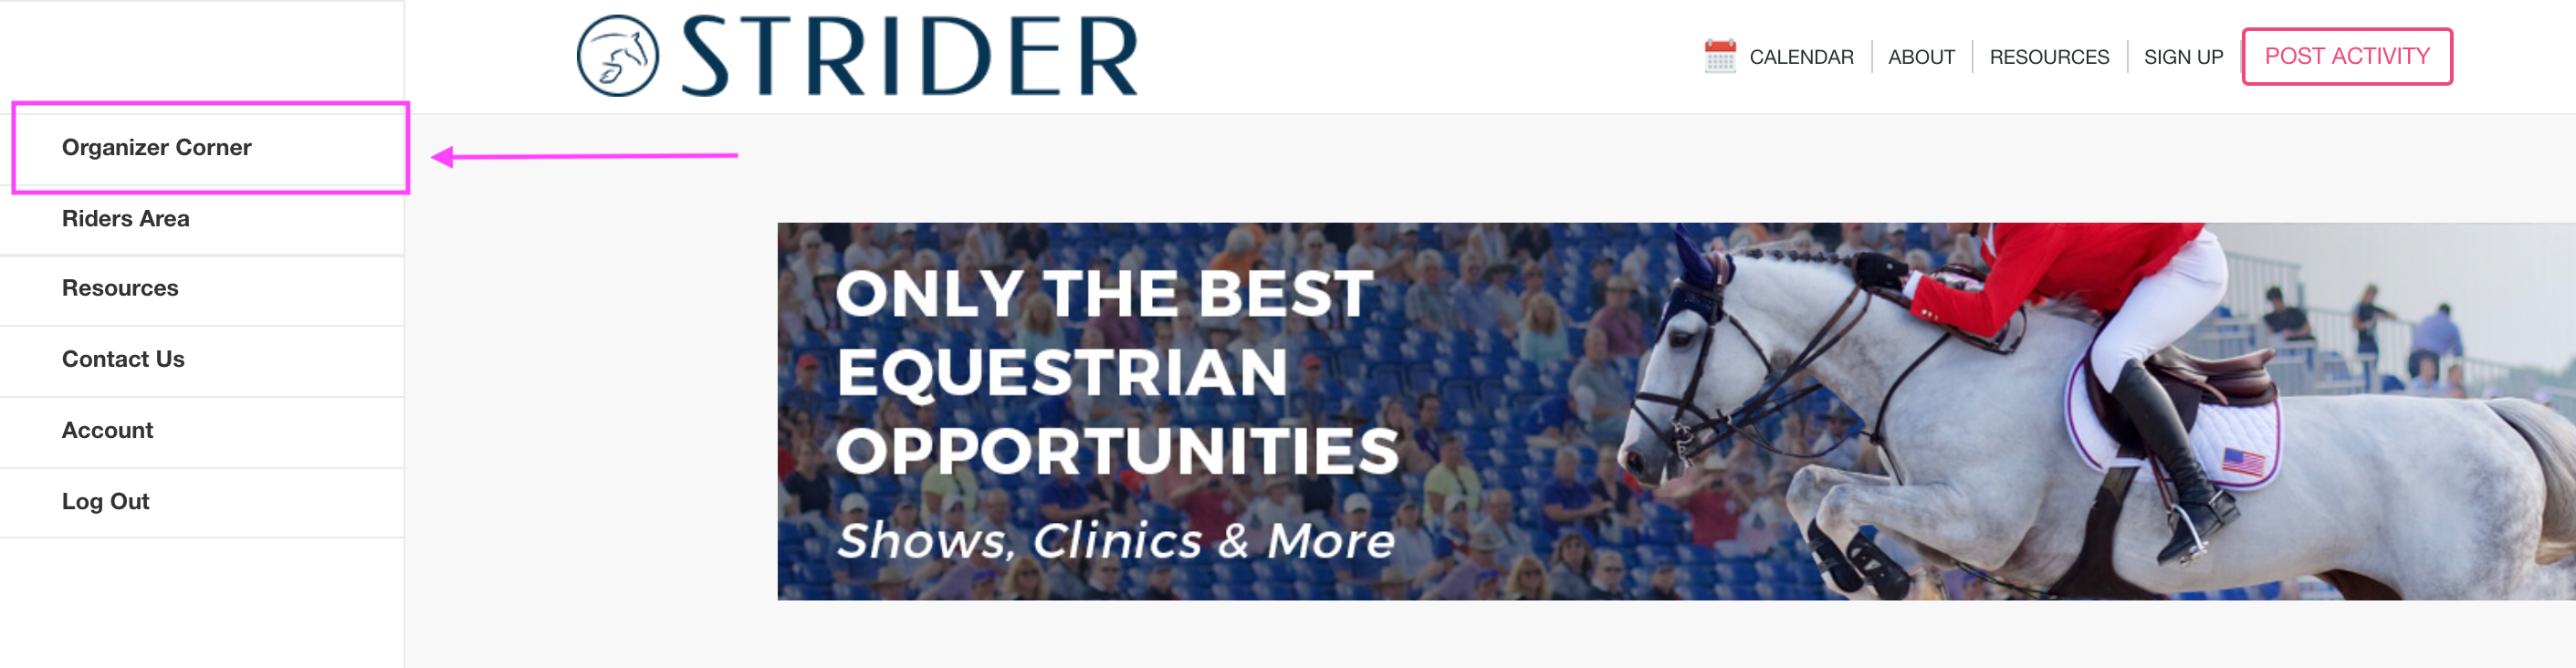
Click <Organizers Corner> at the top left of your screen.
The Organizer’s Corner is where you’ll find most of the tools you need to promote, manage, and organize rider registrations you receive online.
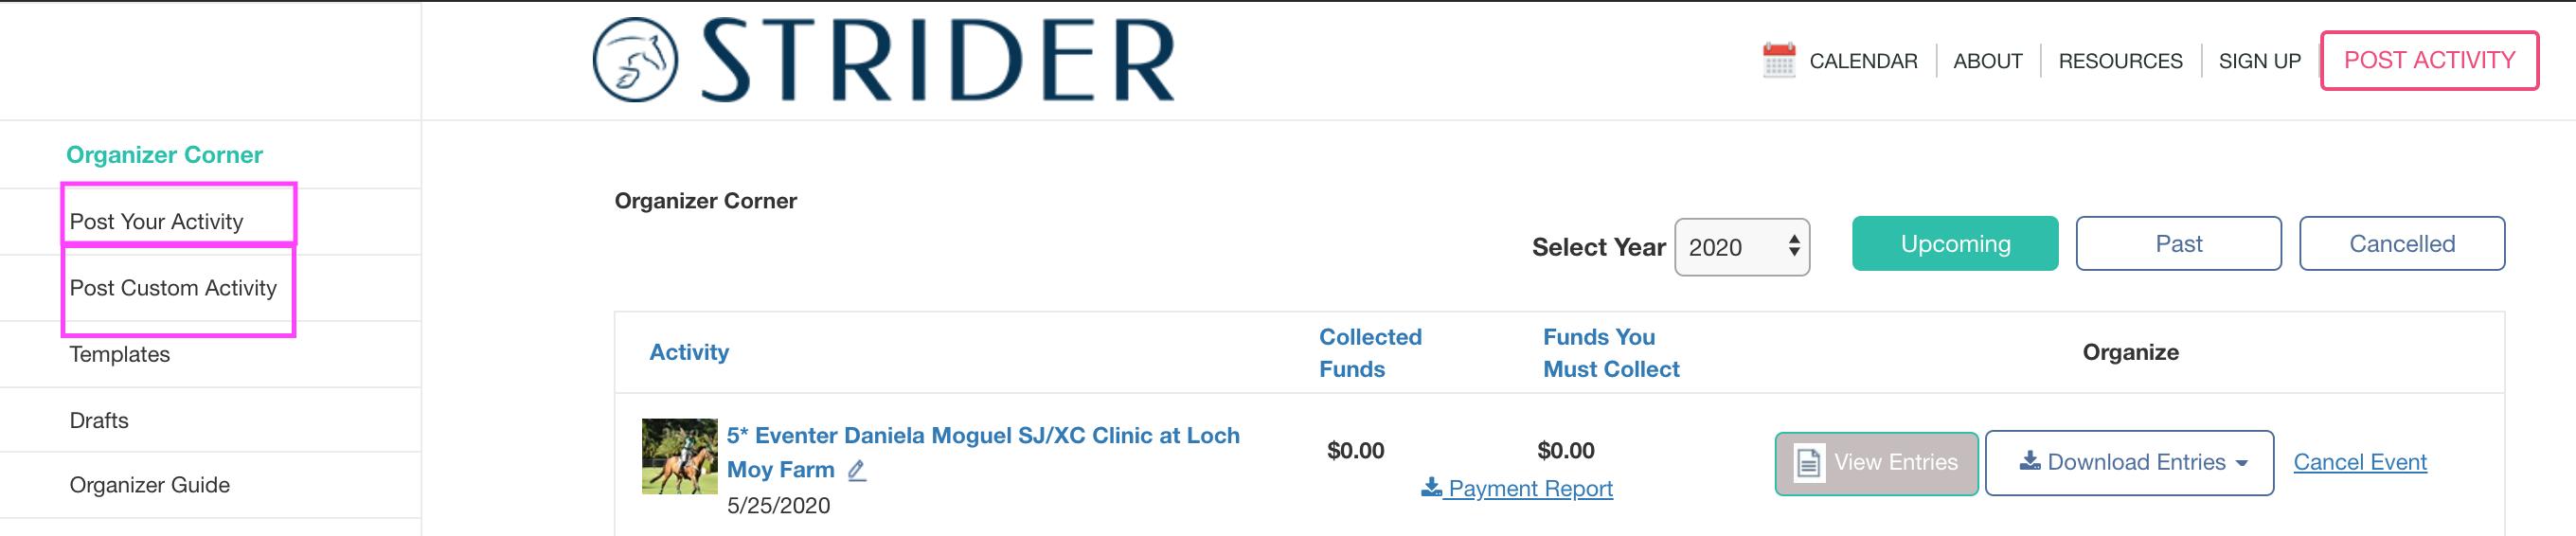
Click the “Post Your Activity” tab.
That will bring you into the Standard Announcement Form. Select any activity listed.
(Offering something standard in a discipline that you don’t see listed? No worries!
We can add. Contact our support team to request.
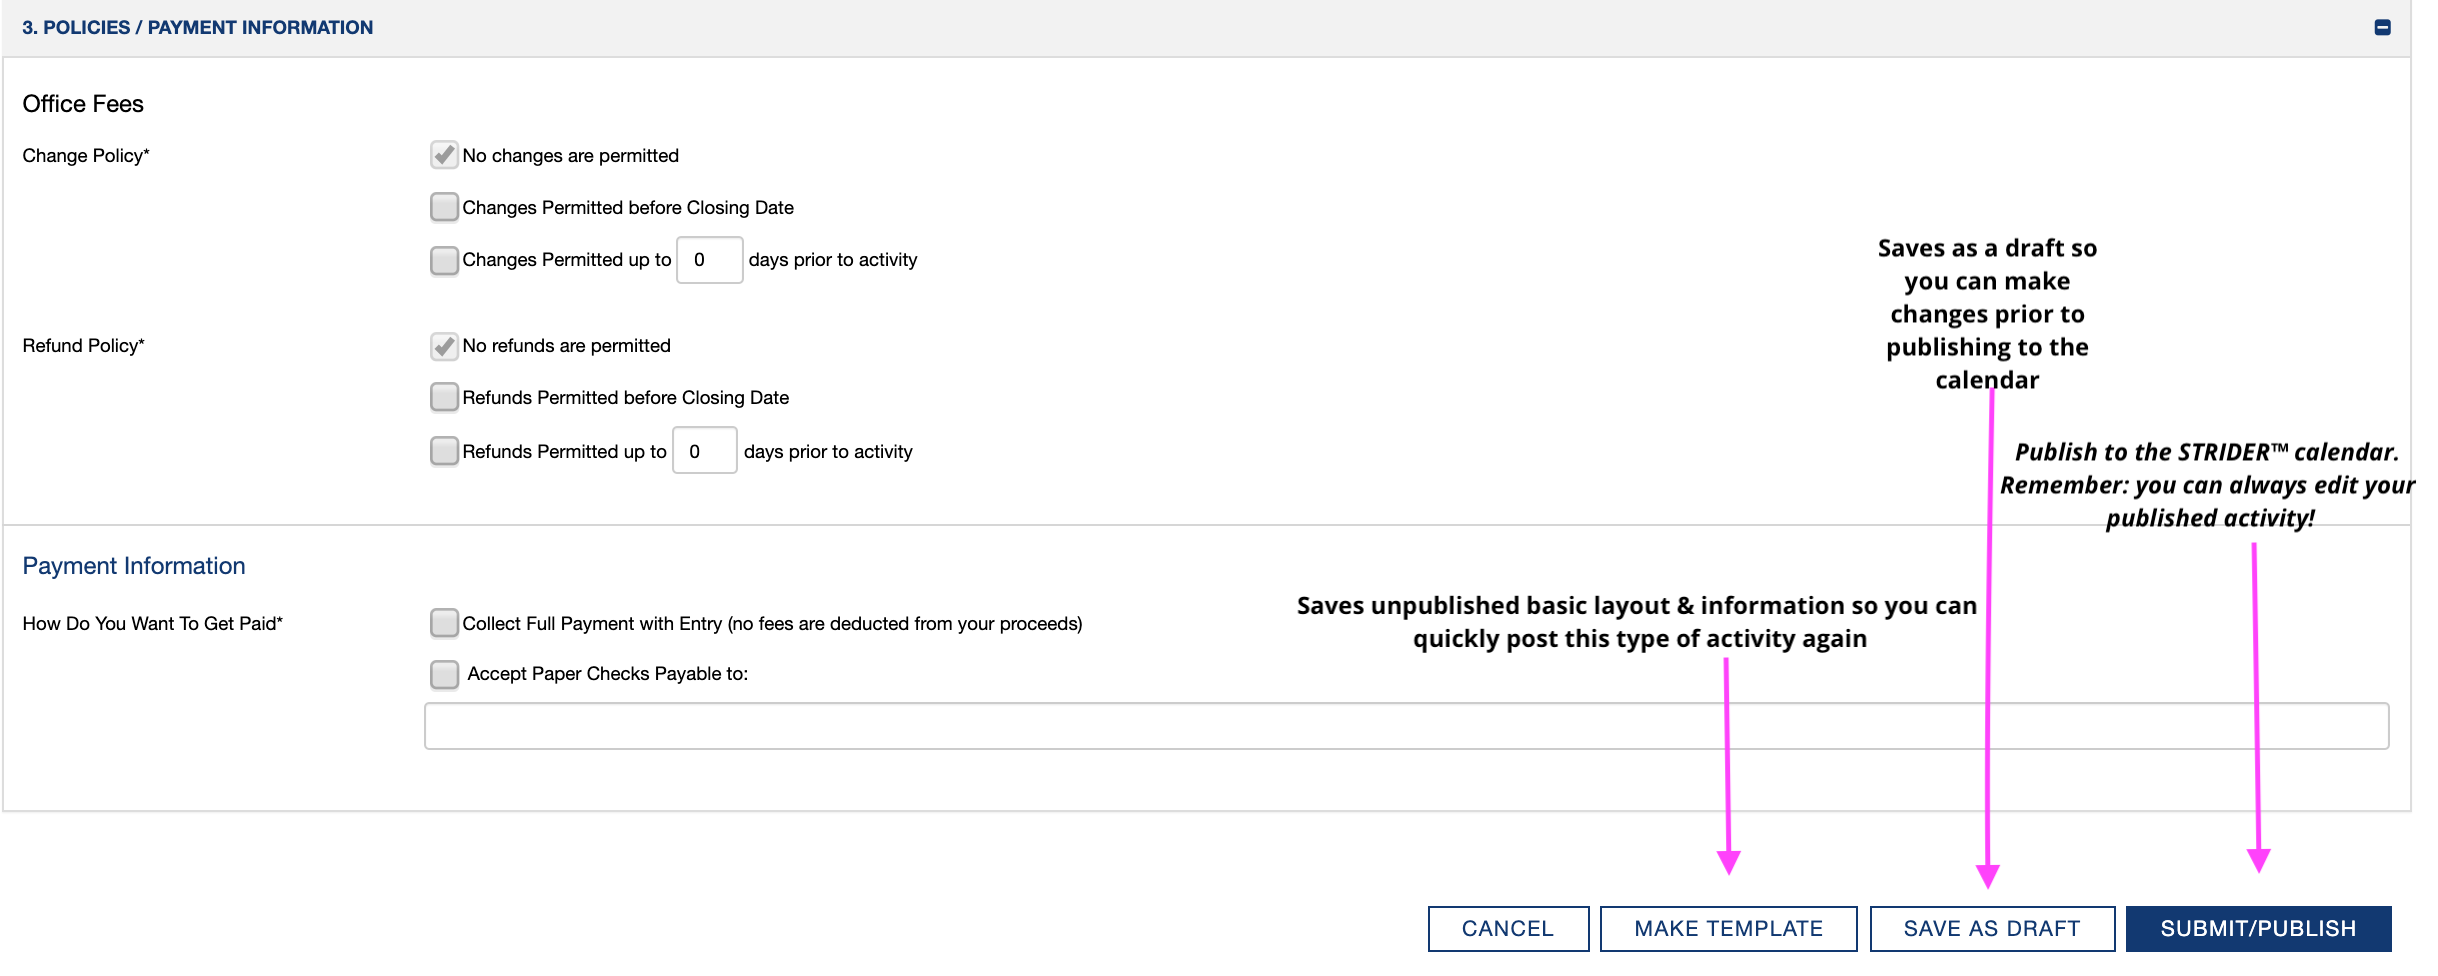
-“Standard” is something that reasonably gets 5,000 or more entries annually across the nation, at multiple venues.)- We recommend always saving your announcement as a draft so that you don’t lose your work!
Complete the form fields.
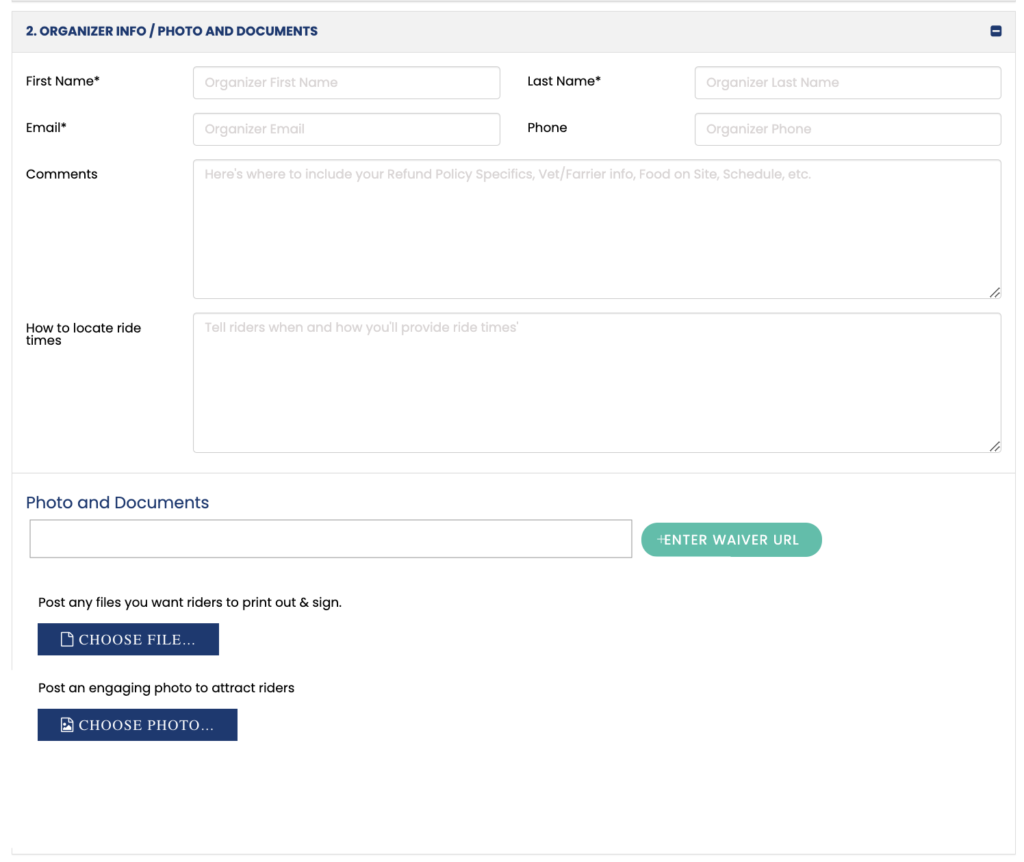
Section 2: ORGANIZER INFO/PHOTO & DOCUMENTS is where you’ll want to put the bulk of your administrative details.
Waiver URL: Venues find they get a higher # of entries when they offer digital waivers. It simply makes it that much easier for rider to complete their entry…rahter than having to find a printer.
Sign up here for a digital waiver- it will save you thousands in labor costs annually.
Still offering paper?
“Choose File (Upload Documents):” If you want riders to send you a signed release, upload it here so riders can access it. Riders have the ability to digitally attach documents at no additional charge to their Strider entry.

4.) Decide How You Want TO Collect Payment
Its easy to collect payment in full as riders register with StriderPay™. It’s a great free technology that delivers 100% of proceeds straight into your bank account. Our StriderPay Guide will get you started.
Yes, you can accept checks from riders. But remember, checks make it easier for riders to be a no-show. If you want more reassurance you won’t be left holding the bag, require full payment at time of registration.
Set Up Templates (Optional)
Hosting multiple events? Templates are a great way to reuse information you’ve entered. Save the Announcement as a Template BEFORE you click <Publish> if you want to reuse any of the typed information. Then go to the <Templates> tab to create a draft and publish.
5.) Publish!
Click <PUBLISH> when you are ready to tell the world! The system will create a custom URL for your activity. (You can make changes anytime.)
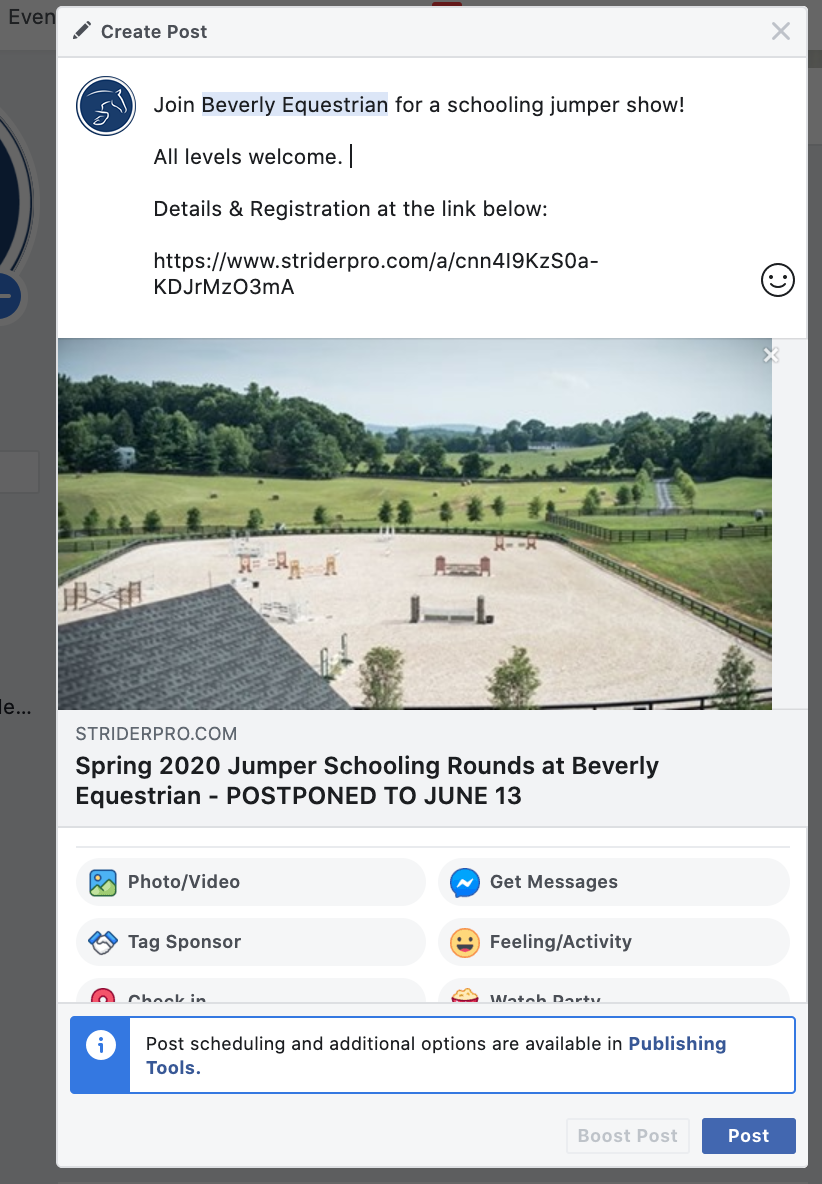
Once it’s live, you’ll want to invite Riders to Enter! Do this by sending out your custom URL / link via email or social media.
- Copy the Strider URL for your activity in your browser.
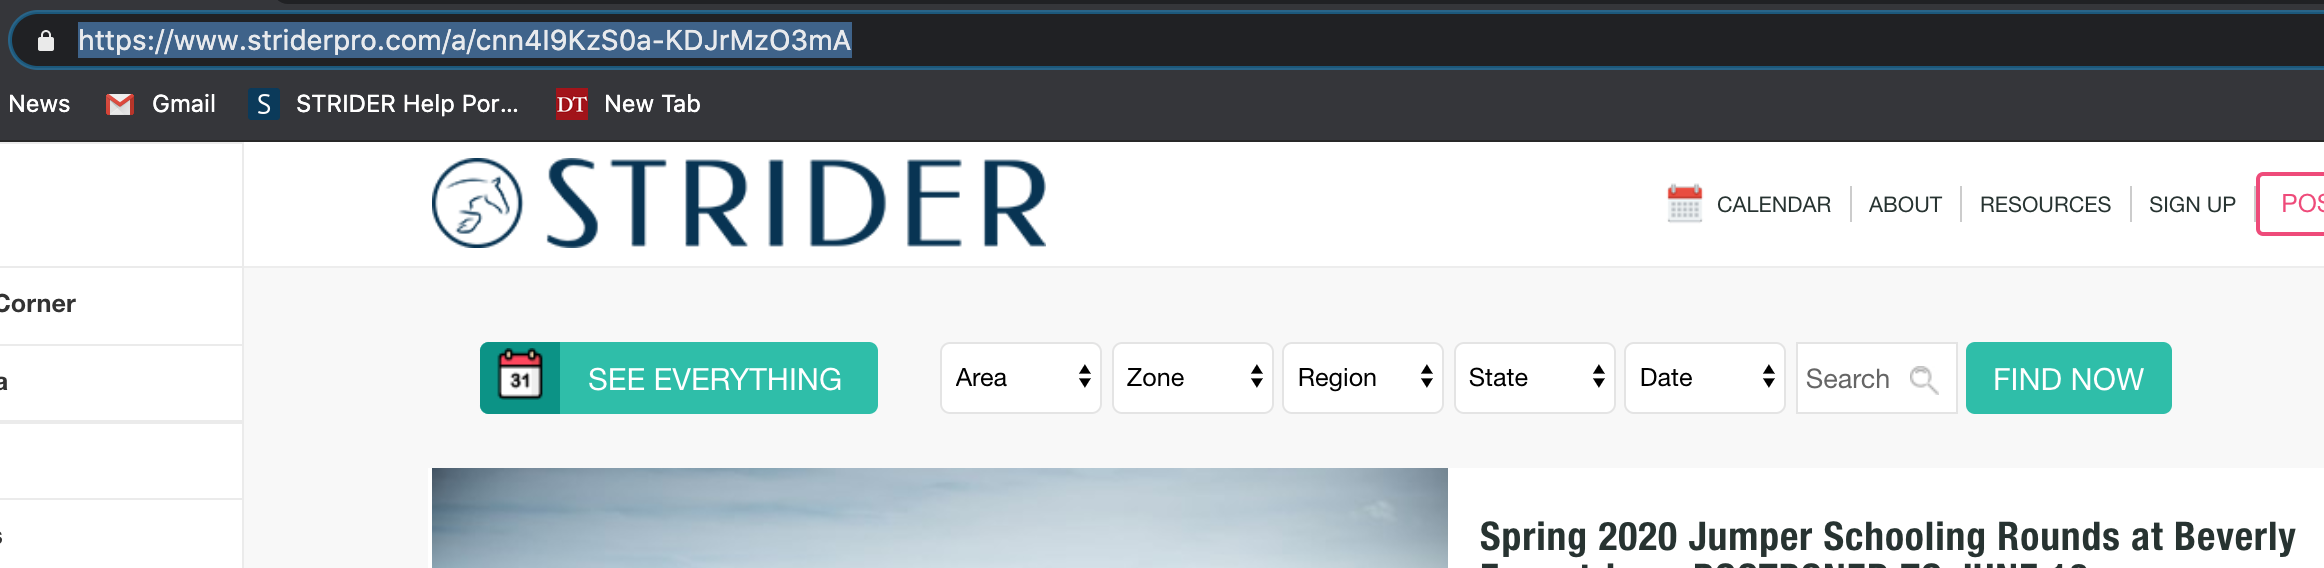
2. Email out, or paste into Facebook.
You’ll automatically create a “preview” of your activity that riders can click and use to access the entry form.